


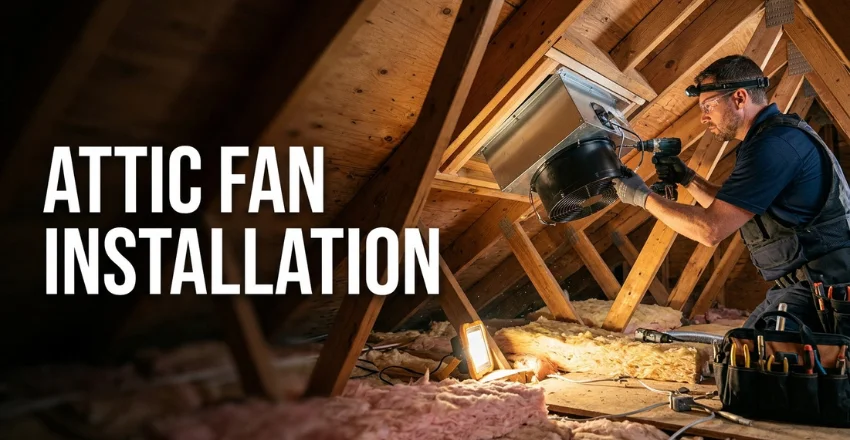
Attic fan installation can remove hot air from an unconditioned roof space during warm weather. Yet adding a powered unit isn’t automatically the best ventilation upgrade for every U.S. home. Air sealing, insulation, intake ventilation, climate, and existing equipment should be checked first.
Quick answer: An attic fan exhausts hot air while outside air enters through soffit or gable vents. Installation works only with enough intake ventilation and a well-sealed ceiling below. For many homes, improving insulation and passive ventilation should come before adding a powered unit.
Attic Fan Installation at a Glance
| Topic | What homeowners should know |
|---|---|
| Main purpose | Exhaust hot air from an unconditioned roof space |
| Common types | Gable-mounted, roof-mounted, electric, and solar |
| Typical 2026 professional cost | About 369–914 for many projects |
| Key requirement | Adequate outdoor-air intake through soffit, eave, or gable vents |
| Main risk | Pulling conditioned household air into the roof space |
| DIY difficulty | Moderate to high, especially with roofing or electrical work |
| Best first checks | Air sealing, insulation, passive ventilation, and duct condition |
| Professional help | Roofer, electrician, HVAC contractor, or qualified ventilation specialist |
Current Angi data places many professional installations between $369 and $914, with a national average near $626. Costs change with mounting type, wiring, roof access, and ventilation work. More difficult roof penetrations or electrical upgrades can push a project higher.
The price alone shouldn’t determine whether this project makes sense. The U.S. Department of Energy’s Building America guidance generally favors passive ventilation over powered attic ventilators. ENERGY STAR also warns that a poorly sealed ceiling can let a powered unit pull cooled indoor air upward.
How a Powered Attic Ventilator Works
A powered ventilator sits in a roof opening or exterior gable wall. Its motor exhausts warmer air from the upper part of the roof space. Replacement air should enter through lower soffit, eave, or gable intake openings.
This airflow pattern matters because an exhaust unit creates negative pressure. Without adequate intake openings, replacement air may come from the living space below. That can increase air-conditioning demand instead of reducing it.
A powered roof ventilator also differs from a whole-house fan. Whole-house systems pull outdoor air through open windows and living areas. They then discharge that household air into the roof space before it exits outdoors.
Should You Install One at All?
Start by identifying the problem you want to solve. High summer temperatures alone don’t prove that mechanical exhaust is necessary. Poor insulation, ceiling leakage, blocked soffits, or leaky ducts may create the bigger problem.
DOE guidance says powered ventilators can lower roof-space temperatures, but energy savings are often limited. In some homes, operating energy and increased air leakage can erase the cooling benefit. Passive ventilation, insulation, and ceiling air sealing often deserve attention first.
HomeVotel’s guide to planning insulation and ventilation during renovation explains why these systems should be considered together. Roofing, HVAC, insulation, and ventilation affect one another. Treating one component in isolation can create new comfort problems.
What You’ll Need Before Installation
The exact materials depend on the product and mounting method. Always follow the manufacturer’s instructions and applicable local codes. Roof work also requires suitable fall protection and safe access.
Typical project needs are listed below.
- Correctly sized powered ventilator
- Manufacturer-approved mounting hardware
- Flashing and roof sealant for roof-mounted models
- Exterior grille for many gable installations
- Thermostat or humidistat, when specified
- Electrical cable, junction boxes, and approved connectors
- Measuring and marking tools
- Drill, fasteners, and appropriate cutting tools
- Personal protective equipment
- Adequate intake vent area
Inspect the surrounding structure before opening a wall or roof. Rot, water staining, damaged decking, or weak framing need attention before you add equipment. HomeVotel’s roof replacement cost guide also explains how decking and ventilation can affect roofing work.
How Installation Works: 6 Main Steps
1. Inspect Air Sealing and Existing Ventilation
Check whether soffit, eave, ridge, and gable openings are clear. Look for insulation blocking lower intake pathways. Confirm that bathroom or kitchen exhaust ducts terminate outdoors, not inside the roof space.
The ceiling between conditioned rooms and the attic should also be well sealed. Gaps around wiring, plumbing, access hatches, and fixtures can leak conditioned air upward. Those leaks become more important after adding mechanical exhaust.
2. Choose the Mounting Location
Gable models usually attach behind an existing gable opening. Roof-mounted models require a new penetration through roofing and decking. Both locations need an unobstructed path for exhaust air.
Place the exhaust point high enough to remove warmer air effectively. Keep intake openings lower and separate from the exhaust. This arrangement encourages airflow across more of the roof space.
3. Prepare the Opening
A gable installation may require framing adjustments around the existing opening. The unit should sit securely without leaving large bypass gaps around its housing. Exterior louvers must also resist rain and pest entry.
A roof-mounted unit requires more caution because the roofing system is disturbed. Cutting dimensions must match the manufacturer’s template. Incorrect flashing can create leaks that cost far more than the original project.
4. Mount and Weatherproof the Unit
Fasten the housing according to its installation instructions. A roof model must integrate correctly with shingles, underlayment, and flashing. Sealants should supplement proper flashing rather than replace it.
This stage is one reason professional installation can be worthwhile. Roof geometry, material type, and existing damage affect waterproofing details. A poor seal may remain unnoticed until heavy rain exposes the problem.
5. Complete the Electrical Connection
Hardwired models require an approved electrical supply and control arrangement. The circuit, disconnecting method, junction box, and conductor sizing must meet applicable requirements. Local rules can also determine whether a permit or licensed electrician is needed.
Solar units avoid a household wiring run, but roof mounting still requires care. Their output also depends on available sunlight and system design. Follow the manufacturer’s orientation and mounting instructions rather than using a generic placement rule.
6. Test Airflow and Controls
Run the system and confirm that exterior shutters open correctly. Check for unusual vibration, noise, or movement around the housing. Verify the thermostat or humidity controls match the manufacturer’s settings.
Next, look for signs that the unit lacks replacement air. Strong suction at an attic hatch can indicate unwanted pressure differences. You may need to correct intake ventilation or air leakage before regular operation.
How Much Does Installation Cost in 2026?
Recent national cost data varies because projects differ considerably. Angi and HomeAdvisor both place many professional jobs around $369 to $914. Their current reported average sits near $626.
Your quote may rise when new wiring or difficult roof work is required. Steep slopes, delicate roofing materials, restricted access, and structural repairs also add labor. A straightforward gable installation can cost less because it may use an existing wall opening.
Ask contractors to separate equipment, electrical work, mounting, flashing, and added ventilation. Itemized quotes make competing proposals easier to compare. They also reveal whether one contractor included corrective work that another excluded.
Roof-Mounted vs. Gable-Mounted vs. Solar


| Option | Main advantage | Main drawback | Often suits |
|---|---|---|---|
| Gable-mounted electric | May use an existing opening | Needs suitable gable placement | Homes with usable gable vents |
| Roof-mounted electric | Flexible exhaust location | Requires roof penetration | Homes without suitable gable access |
| Solar-powered | No household electricity use | Higher equipment cost | Sunny locations with suitable roof exposure |
No mounting style is automatically right for every house. Existing construction should guide the choice, not product advertising. The ventilation plan matters more than selecting the strongest motor.
Homes with roof repairs already planned may have an easier opportunity for ventilation changes. HomeVotel’s guidance on common roof repair and ventilation problems provides useful context for inspections. Coordinating both projects can reduce unnecessary disturbance to newer roofing.
Important Safety and Building-Performance Risks
A powerful exhaust unit can depressurize the roof space. That pressure may pull cooled or heated air through ceiling leaks. DOE guidance also warns about possible interactions with combustion equipment under certain conditions.
Moisture problems also need careful diagnosis. Mechanical exhaust isn’t a universal fix for condensation, mold, or ice dams. Air leakage, insulation gaps, indoor humidity, and improperly vented exhaust ducts may be the actual causes.
Ductwork also deserves attention when HVAC equipment passes through an unconditioned attic. Leakage there can waste conditioned air and create comfort problems downstairs. HomeVotel explains related issues in its guide to uneven room temperatures and HVAC airflow.
DIY or Professional Installation?
A capable homeowner may handle some gable-mounted projects if they have the right skills. Roof penetrations and new electrical circuits carry much higher consequences. Mistakes can cause leaks, shock hazards, structural damage, or poor airflow.
Consider professional help when you need to cut or repair roofing. The same applies when new wiring, panel work, or combustion-safety concerns are involved. Older homes may also hide framing, insulation, or wiring conditions that complicate the project.
A roofer can address flashing and roof integration. An electrician can handle hardwired power where required. HVAC or building-performance professionals can evaluate whether mechanical ventilation makes sense before money is spent.
Frequently Asked Questions
Is attic fan installation worth it for most homes?
It depends on the home’s construction and existing ventilation. DOE guidance generally recommends improving passive ventilation, air sealing, and insulation before relying on powered exhaust. A unit can make sense when a qualified assessment finds a specific ventilation need.
Can a powered ventilator lower air-conditioning bills?
It may reduce temperatures inside an unconditioned roof space. That doesn’t guarantee lower household energy use. ENERGY STAR warns that ceiling leakage can make the system pull conditioned air from living areas.
How long does professional installation take?
A simple project may be completed within part of a working day. Complex roof access, new wiring, framing changes, or ventilation corrections can extend the job. Ask your installer for a schedule based on the actual scope.
Do I need more soffit ventilation first?
Possibly, because powered exhaust needs a reliable source of replacement air. Blocked or undersized intake pathways can create unwanted negative pressure. A contractor should inspect intake and exhaust paths before selecting the final unit.
Can I install a roof model myself?
Roof work requires safe access, correct cutting, flashing, and weatherproofing. Electrical models can also require code-compliant wiring. Hiring qualified trades is usually safer when either roofing or electrical work exceeds your experience.
The Best Next Step
Don’t choose a powered ventilator based only on attic temperature. First inspect insulation, ceiling air leakage, passive vents, ductwork, and moisture sources. That assessment may reveal a cheaper and more effective improvement.
If mechanical exhaust still makes sense, compare several itemized contractor quotes. Ask each installer how intake air, roof sealing, controls, and electrical work will be handled. A well-planned installation should solve a defined problem without creating a new one.